
12.29.2023
Important Considerations: Critical Areas Where NOT to Install a Mini Split
Do not install a mini split unit in locations with obstructed airflow, direct sun exposure, excess heat sources, unstable ground, improper height or space considerations. Doing so will undermine performance and efficiency. Installing a mini split system in your home or office can provide efficient heating and cooling comfort. But improper placement can undermine performance, efficiency, and your investment. This guide will highlight key mistakes to avoid when positioning both the outdoor and indoor mini split units. Following our tips will ensure your system runs at peak operation for years to come.

Critical Areas: Where NOT to Install a Mini Split
Do not install a mini split unit in locations with obstructed airflow, direct sun exposure, excess heat sources, unstable ground, improper height or space considerations.
What Are Mini Splits?
Before detailing placement pitfalls, let’s review what mini splits are and why they're popular choices compared to central HVAC systems. Mini split systems consist of an outdoor compressor/condenser and one or more slim, wall-mounted indoor units installed in the spaces you want to heat or cool. They offer flexible “zone” climate control, high efficiency ratings up to 30 SEER, and quiet operation. Ductless design also allows installation in spaces without existing ductwork.
Unlike bulky central air conditioners or furnaces, mini split components have a compact footprint. But their positioning still impacts function. Improper placement can lead to:
- Disrupted airflow and uneven temperatures
- Higher electricity bills
- Excess noise disruptions
- Premature breakdowns
Fortunately, avoiding a few key mistakes can ensure your unit lives up to expectations.
GET A PERSONALIZE QUOTE FOR YOUR
DUCTLESS MINI SPLIT SYSTEM TODAY!
Mitsubishi award-winning Diamond Contractor
Serving New York and New Jersey

Where is the Best Location for a Mini Split?
Top Indoor Mini Split Placement Pitfalls
The indoor, wall-mounted unit should be centrally located in the space, ensuring it is at least one foot away from adjacent walls and obstacles. Ideally, it should be positioned at a height between 6 and 7 feet above the floor level. This strategic placement is crucial for enabling wide airflow distribution throughout the space, thereby avoiding the creation of uncomfortable drafts. Next, let's review 5 common mistakes to avoid when placing indoor units.
1. Blocking Airflow
Mini splits rely on optimized airflow to effectively circulate conditioned air throughout a space. However, disrupting this airflow can significantly impact the system's performance. Common examples of obstructions that impede airflow include placement behind curtains, doors, or bookshelves, areas with high foot traffic, corners crammed with furniture, and proximity to return air vents from adjoining spaces. To ensure optimal functioning, it's crucial to maintain at least 1 foot of clearance in front of and around all sides of the indoor unit. For ideal positioning, the unit should be centered on an interior wall and located away from windows, corners, and common walkways. This strategic placement facilitates maximum airflow and enhances overall comfort.
2. Exposure to Direct Sunlight
Direct sun exposure can have a significant impact on the efficiency of a mini split unit by falsely influencing the thermostat, leading to disrupted operation. The solar heat gain can cause the unit to cycle prematurely, increasing the risk of overworking the compressor. To prevent this, it is advisable to avoid placing units on southern walls that face prolonged sunlight. If options are limited, utilizing window treatments to block sun exposure can be an effective solution. Optimal locations for mini split units are on northern walls or in areas that experience minimal solar impact during peak daylight hours. This strategic placement ensures more efficient and reliable operation of the unit.
3. Mounting Too High or Low
Manufacturers typically recommend mounting indoor heads of mini-split systems at an elevation of 6-7 feet above floor level. This specific height is chosen because it enables wide airflow distribution, which is essential for effective heating and cooling. However, there are potential issues with mounting the units too high or too low. When mounted at positions exceeding 7 feet, the system struggles to push airflow down into the occupied areas, leading to uncomfortable drafts and the creation of stratified hot and cold spots. This can also result in inefficient cycling of the unit. On the other hand, mounting the unit lower than 5 feet can blast cold air too close to occupants, which is not only uncomfortable but also wastes energy. This is because hot air tends to accumulate along ceilings due to improper circulation. Therefore, it is crucial to verify that your room allows the unit to be mounted within the ideal 6 to 7 foot elevation before installation to ensure optimal performance and comfort.
4. Too Close to Electronics
Mini splits incorporate electromagnetic components that are susceptible to interference. When these units are mounted too close to antennas, transmitters, or other electronic devices, it can lead to the corruption of signals. This proximity can result in various issues such as disrupted TV, radio, WiFi, and cellular signals, increased equipment noise, and distorted picture quality. To prevent these problems, it is essential to maintain a clearance of at least 3-4 feet from electronic devices such as flat-screen TVs, radios, computers, medical devices, or security systems. This distance helps to minimize the risk of interference and ensures the smooth functioning of both the mini split system and the nearby electronic devices.
5. Unsupported Infrastructure
When mounting a mini-split unit on walls, it's crucial to ensure that the underlying structure meets engineering specifications to adequately support the unit's weight. This support should be distributed across multiple studs or solid blocking. Inadequate support can lead to several risks including loose mounting and misalignment, vibration noises, and potential falling hazards, which could be dangerous. It's not advisable to take chances with walls of questionable strength. Consulting a professional to assess the infrastructure prior to installation is essential for ensuring safety and proper operation of the unit. This step is key in preventing any structural or safety issues related to the installation of mini-split systems.
Can You Install a Mini Split on an Interior Wall?
Yes, you can install a mini split on an interior wall. In fact, interior walls are often the preferred location for installing mini split indoor units. By placing the unit on an interior wall, you can ensure optimal air distribution throughout the room without the influence of external factors like direct sunlight or drafts from windows and doors.
Can You Install a Mini Split Above a Door?
While it is technically possible to install a mini split above a door, it is generally not recommended. Installing a mini split above a door can lead to several issues, such as:
- Insufficient clearance: Doors require clearance to open and close freely, which may not leave enough space for the mini split unit to function properly.
- Airflow disruption: The opening and closing of the door can disrupt the airflow from the mini split, leading to uneven cooling or heating.
- Aesthetic concerns: Installing a mini split above a door may not be visually appealing and can detract from the room's overall appearance.
Instead, it's best to install the mini split on a wall away from doors, windows, and other obstructions to ensure optimal performance and maintain the room's aesthetic appeal.
Can You Install a Mini Split Above a Window?
Similar to installing a mini split above a door, placing a unit above a window is not ideal. This placement can lead to the following issues:
- Direct sunlight exposure: Windows allow sunlight to enter the room, which can affect the mini split's temperature readings and cause it to work harder than necessary.
- Drafts and air leaks: Windows may allow drafts and air leaks, which can interfere with the mini split's ability to maintain a consistent temperature in the room.
- Reduced efficiency: Installing a mini split above a window can reduce its overall efficiency due to the factors mentioned above.
To ensure the best performance and efficiency, install the mini split on an interior wall away from windows and doors.
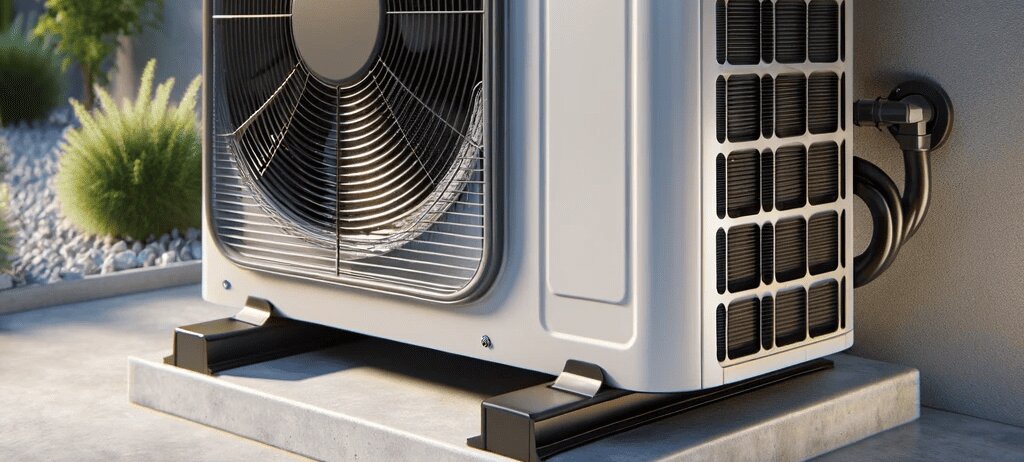
Mini split out door unit
When installing a mini split, it's crucial to ensure that there is adequate wall space to accommodate the unit. The specific wall space requirements may vary depending on the size and model of the mini split, but generally, you should allow for the following:
- Width: The indoor unit typically requires a minimum width of 3 to 4 feet to ensure proper airflow and access for maintenance.
- Height: As mentioned earlier, the ideal height for installing a mini split is between 6 and 7 feet above the floor level. This allows for optimal air distribution throughout the room.
- Clearance: Maintain at least 1 foot of clearance in front of and around all sides of the indoor unit to ensure unobstructed airflow.
How Much Clearance Does a Mini Split Need?
In addition to wall space requirements, it's essential to provide adequate clearance around the mini split unit to ensure proper function and maintenance access. Follow these guidelines for indoor and outdoor units:
Indoor Unit Clearance:
- Front: Minimum 1 foot of clearance
- Sides: Minimum 1 foot of clearance
- Above: Minimum 6 inches of clearance
Outdoor Unit Clearance:
- Front: Minimum 2 feet of clearance
- Sides: Minimum 2 feet of clearance
- Above: Minimum 3 feet of clearance
- Behind: Minimum 1 foot of clearance
GET A PERSONALIZE QUOTE FOR YOUR
DUCTLESS MINI SPLIT SYSTEM TODAY!
Mitsubishi award-winning Diamond Contractor
Serving New York and New Jersey
Where Should You Not Install a Mini Split?
Now that we've covered the best locations and clearance requirements for mini splits, let's discuss some critical areas where you should avoid installing them:
- 1. Near sources of heat: Avoid installing the outdoor unit near heat sources such as dryer vents, stove hoods, furnace exhausts, or chimneys. Heat exposure can reduce the unit's efficiency and lifespan.
- 2. In direct sunlight: Placing the indoor unit in direct sunlight can affect its temperature readings and cause it to work harder than necessary. If possible, install the unit on a north-facing wall or in a shaded area.
- 3. On unstable surfaces: Ensure that the outdoor unit is installed on a stable, level surface, such as a concrete pad. Avoid placing it on soft soil or uneven ground, as this can lead to tilting, misalignment, or damage to the unit.
- 4. Too far from the indoor unit: Keep the distance between the indoor and outdoor units within the manufacturer's recommended range (typically 15-50 feet) to maintain efficiency and prevent strain on the system.
By avoiding these critical areas and following the best practices for mini split placement, you can ensure optimal performance, efficiency, and longevity for your system.
Let Our Experts Optimize Your Mini Split Placement
While mini splits offer flexible installation, positioning missteps can undermine performance gains. By avoiding common indoor and outdoor unit placement pitfalls, your system can operate efficiently for years while maintaining comfort. Still have questions? Contact our team of certified experts for a free consultation. We'll assess your property, usage, and needs to determine optimal mini split placement tailored to your space. Benefit from a design that maximizes comfort and energy savings for the long run. Reach out today to get started!
Back Home - Richair Comfort Solution - Ductless Mini Split Systems Top Quality Installations and Professional Service.
Was This Article Helpful?
RECENT POSTS