
12.15.2023
Condenser Mastery: Comprehensive Guide to Ductless Mini Split Installation
The condenser is a crucial component in a ductless mini split system, playing a pivotal role in the cooling process. This article will delve into the intricacies of the condenser, its role in a ductless mini split system, and the steps involved in its installation. Understanding the condenser and its installation process is essential for anyone considering a ductless mini split system. This knowledge can help you make informed decisions and ensure the longevity and efficiency of your system.
Table of Contents:

Condenser: Ductless Mini Split Installation Explained
Understanding the condenser and its installation process is essential for anyone considering a ductless mini split system.
Understanding the Condenser
The condenser, also known as the outdoor unit, is one of the main components of a ductless mini split system. It is responsible for releasing heat absorbed from the indoor air into the outdoor environment, thus cooling the indoor space. The condenser houses several key components, including the compressor, the condenser coil, and the condenser fan. Each of these components plays a critical role in the heat exchange process.
The Compressor
The compressor is the heart of the condenser. It is responsible for compressing the refrigerant gas, which increases its temperature. This high-temperature, high-pressure gas then moves to the condenser coil.
Compressors come in different types, each with its own set of advantages and disadvantages. The most common types include scroll compressors, rotary compressors, and reciprocating compressors.
The Condenser Coil
The condenser coil is where the actual heat exchange occurs. The high-temperature refrigerant gas releases its heat to the outdoor air as it flows through the coil. As the refrigerant loses heat, it condenses into a high-pressure liquid. The design and material of the condenser coil can significantly affect the efficiency of heat exchange. Copper coils are commonly used due to their excellent heat transfer properties and durability
Installation of the Condenser
The installation of the condenser is a critical step in setting up a ductless mini split system. It involves several steps, from choosing the right location to connecting the refrigerant lines. While it is possible to install the condenser yourself, it is highly recommended to hire a professional. Improper installation can lead to inefficiencies and potential damage to the system.
Choosing the Right Location
The location of the condenser can significantly impact the efficiency of the system. It should be placed in a well-ventilated area, away from direct sunlight and heat sources. The location should also be free from obstructions that could hinder airflow. It is also important to consider noise levels when choosing a location. While modern condensers are relatively quiet, they can still produce some noise during operation. Therefore, it is advisable to place the condenser away from bedrooms and living areas.
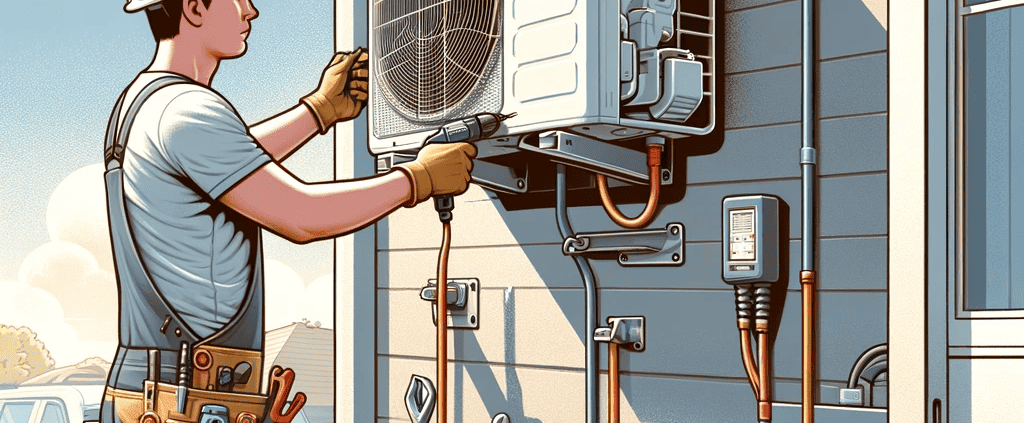
Mounting the Condenser
The condenser can be mounted on the ground or on a wall, depending on the specific model and the available space. Ground mounting is usually simpler, but it may require a concrete pad for stability.
Wall mounting, on the other hand, requires a sturdy wall and a special mounting bracket. It is a good option when ground space is limited or when the condenser needs to be elevated to avoid snow or flooding.
Connecting the Refrigerant Lines
The refrigerant lines connect the condenser to the indoor units. They carry the refrigerant back and forth, allowing the heat exchange process to occur. Installing the refrigerant lines involves drilling a hole through the wall, running the lines, and then sealing the hole. It is crucial to ensure a tight seal to prevent refrigerant leaks and energy loss.
Drilling the Hole
The hole for the refrigerant lines should be drilled at a slight downward angle towards the outdoor side. This helps prevent water from entering the indoor unit. The size of the hole depends on the size of the refrigerant lines and the conduit that houses them. It is important to ensure that the hole is not too large, as this can lead to energy loss and potential damage to the wall.
Running the Lines
The refrigerant lines should be carefully run through the hole and connected to the indoor and outdoor units. It is important to avoid sharp bends and kinks, as these can restrict the flow of refrigerant and reduce the efficiency of the system. Once the lines are in place, they should be insulated to prevent energy loss. The insulation should be secured with tape or cable ties to ensure it stays in place.
Final Steps in the Installation
After the condenser is mounted and the refrigerant lines are connected, there are a few final steps to complete the installation. These include connecting the electrical wiring, charging the system with refrigerant, and testing the system to ensure it is operating correctly.
Connecting the Electrical Wiring
The condenser requires electrical power to operate. The power supply should be connected according to the manufacturer's instructions and in compliance with local electrical codes. It is crucial to ensure a proper ground connection to prevent electrical shocks. The wiring should also be protected with a conduit to prevent damage from weather and pests.
Charging the System with Refrigerant
The system needs to be charged with the correct amount of refrigerant to operate efficiently. This process should be carried out by a licensed professional, as handling refrigerant requires special training and equipment. Once the system is charged, the refrigerant lines should be checked for leaks. Any leaks should be repaired immediately to prevent loss of refrigerant and damage to the environment.
Testing the System
Finally, the system should be tested to ensure it is operating correctly. This involves checking the temperature difference between the indoor and outdoor units, the pressure of the refrigerant, and the operation of the compressor and fan. If any issues are detected during testing, they should be addressed immediately. Regular maintenance and inspections can help ensure the longevity and efficiency of your ductless mini split system.
With your new understanding of the importance of a properly installed condenser in a ductless mini split system, why not ensure your investment is in the best hands? At Richair Comfort, we've been dedicated to providing top-tier HVAC services since 1994. Our commitment to quality, customer service, and eco-friendly solutions makes us the ideal partner for your ductless mini split needs. Don't compromise on efficiency or comfort—? Interested in Reliable Maintenance? Schedule your service with us today and experience the Richair Comfort difference!
Back Home - Richair Comfort Solution - Ductless Mini Split Systems Top Quality Installations and Professional Service.
Was This Article Helpful?
RECENT POSTS