01.02.2024
Evaporator Coil Explained: Ductless Mini Split System Installation
The evaporator coil is a critical component in the operation of a ductless mini split system. It's responsible for absorbing heat from the air in your home, thereby cooling it. This article delves into the intricate details of the evaporator coil, its role in a ductless mini split system, and how it is installed. Understanding the evaporator coil and its installation process is crucial for anyone considering a ductless mini split system. This knowledge can help you ensure that your system is installed correctly, operates efficiently, and provides the desired level of comfort.
Table of Contents:

Evaporator Coil: Ductless Mini Split Installation Explained
In a ductless mini split system, the evaporator coil is located inside the indoor unit.
Understanding the Evaporator Coil
The evaporator coil is a network of tubes filled with refrigerant. As warm air from your home passes over these coils, the refrigerant inside absorbs the heat, causing the refrigerant to evaporate. This process cools the air, which is then circulated back into your home. The evaporator coil is typically made of copper, which is an excellent conductor of heat. It's also resistant to corrosion, which is important as the coil is in constant contact with moisture and air.
Role of the Evaporator Coil in a Ductless Mini Split System
In a ductless mini split system, the evaporator coil is located inside the indoor unit. This is different from traditional HVAC systems, where the evaporator coil is typically located near the air handler in the basement or attic. The location of the evaporator coil in a ductless system allows for more efficient cooling. Because the coil is closer to the space being cooled, it can absorb heat more directly and effectively.
How the Evaporator Coil Works
The operation of the evaporator coil is based on the principles of heat transfer and phase change. As warm air passes over the coil, the heat energy is transferred to the refrigerant inside the coil. This causes the refrigerant to change from a low-pressure liquid to a low-pressure gas, a process known as evaporation.
The now-cooled air is then circulated back into the room by the system's fan. Meanwhile, the refrigerant, now in its gaseous state, is returned to the outdoor unit where it is compressed and cooled to start the process again.


Installing the Evaporator Coil
Installing the evaporator coil in a ductless mini split system is a complex process that should be carried out by a qualified HVAC technician. The process involves several steps, including mounting the indoor unit, connecting the refrigerant lines, and testing the system. Proper installation of the evaporator coil is crucial for the efficient operation of the system. If the coil is not installed correctly, it can lead to problems such as poor cooling performance, increased energy consumption, and even system failure.
Mounting the Indoor Unit
The first step in installing the evaporator coil is mounting the indoor unit. This involves selecting a suitable location for the unit, installing a mounting plate on the wall, and attaching the unit to the plate. The location should be away from direct sunlight and sources of heat, and should allow for unrestricted airflow. Once the unit is mounted, the refrigerant lines can be connected. These lines carry the refrigerant between the indoor and outdoor units, and must be installed correctly to prevent leaks and ensure efficient operation.
Connecting the Refrigerant Lines
Connecting the refrigerant lines involves running the lines through a hole in the wall to the outdoor unit. The lines must be insulated to prevent heat loss, and the hole in the wall must be sealed to prevent air leakage. Once the lines are connected, the system must be vacuumed to remove any air and moisture. This is a critical step, as air and moisture can cause corrosion and damage to the system.
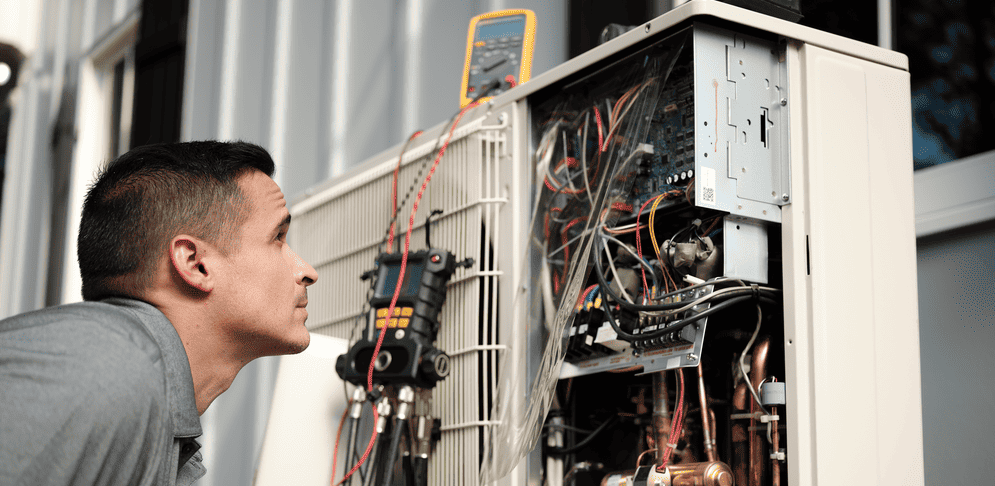
Technician Testing Mini Split System
After the evaporator coil and the rest of the system have been installed, the system must be tested to ensure it is operating correctly. This involves checking the system's cooling performance, ensuring there are no refrigerant leaks, and verifying that all controls are working properly. During testing, the system's refrigerant pressure should be monitored to ensure it is within the manufacturer's specified range. If the pressure is too high or too low, it could indicate a problem with the system that needs to be addressed.
Checking for Refrigerant Leaks
One of the most important checks during system testing is checking for refrigerant leaks. Even a small leak can significantly impact the system's performance and efficiency. In addition, refrigerant leaks can be harmful to the environment. There are several methods for checking for refrigerant leaks, including electronic leak detectors, ultraviolet dye, and soap bubble tests. If a leak is detected, it must be repaired immediately to prevent further damage to the system.
Verifying Control Operation
The final step in system testing is verifying the operation of the controls. This includes the thermostat, remote control, and any other controls that are part of the system. These controls should be tested to ensure they are working properly and are accurately controlling the system's operation. If any issues are found during system testing, they should be addressed immediately. This may involve adjusting the refrigerant charge, repairing leaks, or replacing faulty components.
Maintaining the Evaporator Coil
Once the evaporator coil is installed and the system is operating correctly, regular maintenance is crucial to keep the coil and the rest of the system in good working order. This includes cleaning the coil, checking for refrigerant leaks, and inspecting the system regularly. Regular maintenance can help prevent problems, improve system performance, and extend the life of the system. It's recommended to have your system serviced by a qualified HVAC technician at least once a year.
Cleaning the Evaporator Coil
The evaporator coil should be cleaned regularly to remove dust, dirt, and other debris. These can build up on the coil over time, reducing its ability to absorb heat and cool the air. Cleaning the coil can improve system performance and efficiency. There are several methods for cleaning the evaporator coil, including using compressed air, a soft brush, or a coil cleaning solution. The method used will depend on the amount and type of debris on the coil.
Checking for Refrigerant Leaks
As part of regular maintenance, the system should be checked for refrigerant leaks. As mentioned earlier, even a small leak can have a significant impact on system performance and efficiency. Regular checks can help detect leaks early, before they cause more serious problems. If a leak is detected during a maintenance check, it should be repaired immediately. Depending on the size and location of the leak, this may involve replacing a section of refrigerant line, repairing a connection, or replacing the evaporator coil.
Regular System Inspection
Regular system inspection is another important part of maintaining the evaporator coil and the rest of the system. This involves checking the system's components, controls, and operation to ensure everything is working properly. During an inspection, the technician will check the system's refrigerant pressure, inspect the indoor and outdoor units, and test the controls. Any issues found during the inspection should be addressed immediately to prevent further problems.
Conclusion
The evaporator coil is a critical component in a ductless mini split system. It plays a key role in cooling the air in your home, and its proper installation and maintenance are crucial for the system's performance and efficiency. By understanding the evaporator coil and its installation process, you can ensure that your ductless mini split system is installed correctly, operates efficiently, and provides the desired level of comfort. Regular maintenance, including cleaning the coil and checking for refrigerant leaks, can help keep your system in good working order and extend its life.
Ready to experience the pinnacle of home comfort with a ductless mini split system? At RIchair Comfort, we pride ourselves on delivering exceptional quality and customer service since 1994. Our team of experts is dedicated to providing you with the most efficient and environmentally friendly ductless technology available. Don't let installation worries hold you back – let us handle it for you. ? Interested in Reliable Maintenance? Schedule your service today and join the RIchair Comfort family, where your satisfaction is our top priority.
Back Home - Richair Comfort Solution - Ductless Mini Split Systems Top Quality Installations and Professional Service.
Was This Article Helpful?
RECENT POSTS